Pi-hole Tutorial #1 – Configure Your Own DNS Black Hole

What This Builds
This guide creates a clean, production-style DNS stack:
- Pi-hole is the DNS policy engine
- log2ram reduces SD card wear
- Periodic fsck ensures filesystem health
Requirements
Hardware
- Raspberry Pi
- 16GB+ microSD
- Network connection
Step 1. Install Raspberry Pi OS
Install and Open
Raspberry Pi Imager
Select:
Raspberry Pi OS Lite (64-bit)Disclaimer: The images for this section are from my most recent run of creating a Pi-hole, and for some reason the GUI for the Raspberry Pi installer has some gibberish for the buttons. I suspect this is an odd artifact from my laptop’s monitor resolution conflicting with the Raspberry Pi Imager GUI.
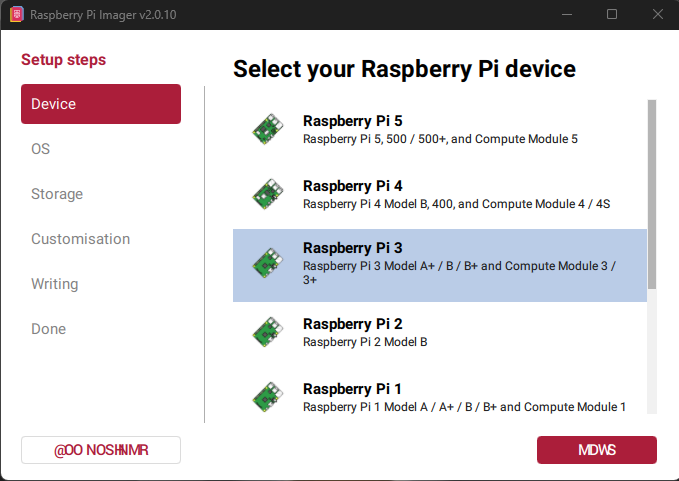
Note: Tutorial is built using a Raspberry Pi 3 Model B+
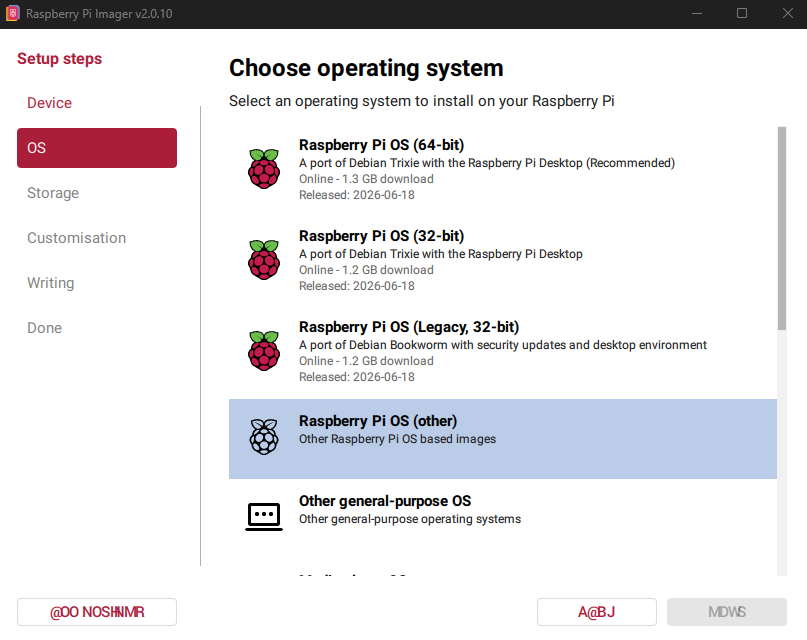
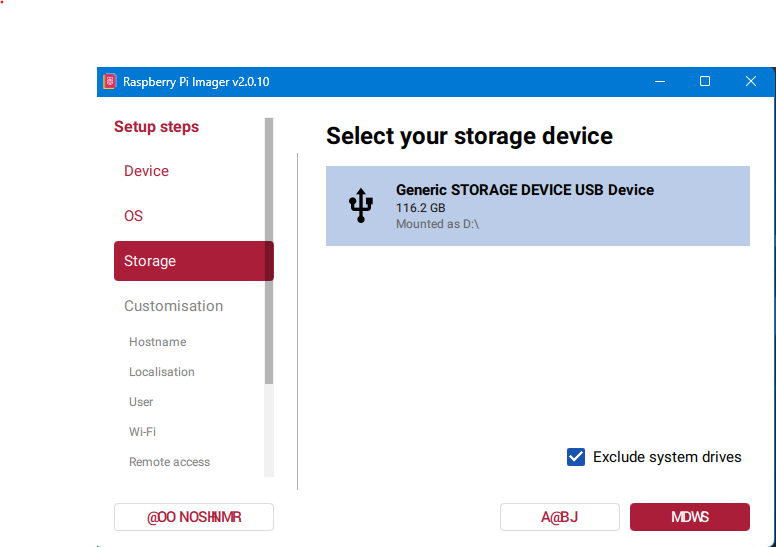
Enable:
- SSH
- hostname (ex:
pihole) - user/password
Boot and SSH in.
Step 2. Base System Preparation
Update system:
sudo apt update && sudo apt upgrade -yInstall utilities:
sudo apt install -y curl ca-certificates gnupgOptional configuration:
- timezone
- locale
- expand filesystem
sudo raspi-configStep 3. Install log2ram
This keeps log files in RAM and periodically syncs them to disk to reduce SD card wear. Trust me you don’t want SD card failure knocking out your entire network!
Install:
sudo raspi-config
echo "deb http://packages.azlux.fr/debian/ bookworm main" | sudo tee /etc/apt/sources.list.d/azlux.list
wget -qO - https://azlux.fr/repo.gpg.key | sudo gpg --dearmor -o /usr/share/keyrings/azlux.gpg
sudo apt update
sudo apt install -y log2ram
Reboot:
sudo rebootVerify:
systemctl status log2ramA brief engineering note:
Requirement origin: SD card crapped out once.
Mitigation: log2ram + periodic fsck.
Verification: never trust the Bastard again.
Step 4. Configure periodic filesystem checks
Periodic fsck ensures SD card corruption is detected early.
Run:
sudo tune2fs -c 20 /dev/mmcblk0p2This forces a filesystem check every 20 mounts.
sudo tune2fs -l "$(findmnt -no SOURCE /)" | grep -E 'Mount count|Maximum mount count'You want something resembling:
Mount count: 5
Maximum mount count: 20
Step 5. Configure a Static IP
Before installing Pi-hole we need to give it a static LAN IP address. Do not rely solely on a router DHCP reservation. This ensures the Pi remains reachable even if the router’s DHCP configuration for the Pi IP changes later.
For the purposes of this guide, I am going to assume the following configuration for this section.
Pi IP:          192.168.1.80
Subnet:         /24 (255.255.255.0)
Router/Gateway: 192.168.1.1
DNS:            192.168.1.1
The first step to set a static IP address is to identify the NetworkManager connection the Pi is using. In my example, I built to use an ethernet port.
nmcli connection showwhich will produce a result similar to this:
NAME                UUID                                  TYPE      DEVICE
Wired connection 1  *redacted*                            ethernet  eth0
lo                  ...                                   loopback  lo
Obviously we want eth0 and will need to check the current configuration using the below:
nmcli device show eth0 | egrep 'GENERAL.CONNECTION|IP4.ADDRESS|IP4.GATEWAY|IP4.DNS'Which will produce something resembling this:
GENERAL.CONNECTION: Wired connection 1
IP4.ADDRESS[1]:     192.168.1.80/24
IP4.GATEWAY:        192.168.1.1
IP4.DNS[1]:         192.168.1.1
However, we can’t just assume the fact that we see 192.168.1.80 here that we have a static IP address, so we will need to run the below to determine if the IP is static or not:
nmcli -f ipv4.method,ipv4.addresses,ipv4.gateway,ipv4.dns \
connection show "Wired connection 1"
If you see the ipv4 method indicate auto, then you know the IP is still configured via DHCP like below.
ipv4.method:    auto
ipv4.addresses: --
ipv4.gateway:   --
ipv4.dns:       --
So don’t be fooled like I was and let’s make it static!
In order to make it static we want to set our eth0 connection to manual addressing from auto and populate the remaining fields of that configuration block as shown below:
sudo nmcli connection modify "Wired connection 1" \
ipv4.method manual \
ipv4.addresses 192.168.1.80/24 \
ipv4.gateway 192.168.1.1 \
ipv4.dns 192.168.1.1
At this stage, using the router (192.168.1.1) as the Pi’s DNS server is fine. The Pi’s own DNS configuration can be changed later if the final DNS architecture requires it.
Important: Make sure 192.168.1.80 is not part of a DHCP pool that could assign the same address to another device. Either exclude it from the pool or maintain a corresponding reservation.
Now to verify the command worked:
nmcli -f ipv4.method,ipv4.addresses,ipv4.gateway,ipv4.dns \
connection show "Wired connection 1"
Output:
ipv4.method:     manual
ipv4.addresses:  192.168.1.80/24
ipv4.gateway:    192.168.1.1
ipv4.dns:        192.168.1.1
Note the ipv4 method changed to manual and the values have been populated. This is the big win, and now we’re just going to reboot and do one last verification and we’re good to roll to installation!
sudo rebootOnce we’re logged back in the Pi run this to verify we’re still using a static IP address.
hostname -I
ip route
nmcli -f ipv4.method,ipv4.addresses,ipv4.gateway,ipv4.dns \
connection show "Wired connection 1"
If everything worked, you should see the below:
192.168.1.80
default via 192.168.1.1 dev eth0 proto static
192.168.1.0/24 dev eth0 proto kernel scope link src 192.168.1.80
ipv4.method: manual
ipv4.addresses: 192.168.1.80/24
ipv4.gateway: 192.168.1.1
ipv4.dns: 192.168.1.1
The proto static route and ipv4.method: manual confirm that the Pi is no longer dependent on DHCP to obtain 192.168.1.80.
Congratulations, we have a static IP address and can move onto the Pi-hole installation!
Step 6. Install Pi-hole
Now this is where the fun begins!

Run installer:
curl -sSL https://install.pi-hole.net | sudo bashMy recommendation is set it as you want. I’ve been using Quad9 (filtered, DNSSEC) for my personal network, but it’s up to you to do your own research.
You’ll also want to change your admin password:
sudo pihole setpasswordVerify Pi-hole DNS is Working:
ss -tulnp | grep :53Once you get through those screens, you have successfully (hopefully) installed your very own Pi-hole!
To access the Pi-hole on your network, simply browse to http://<insert-IP-here>/admin/ and have fun!
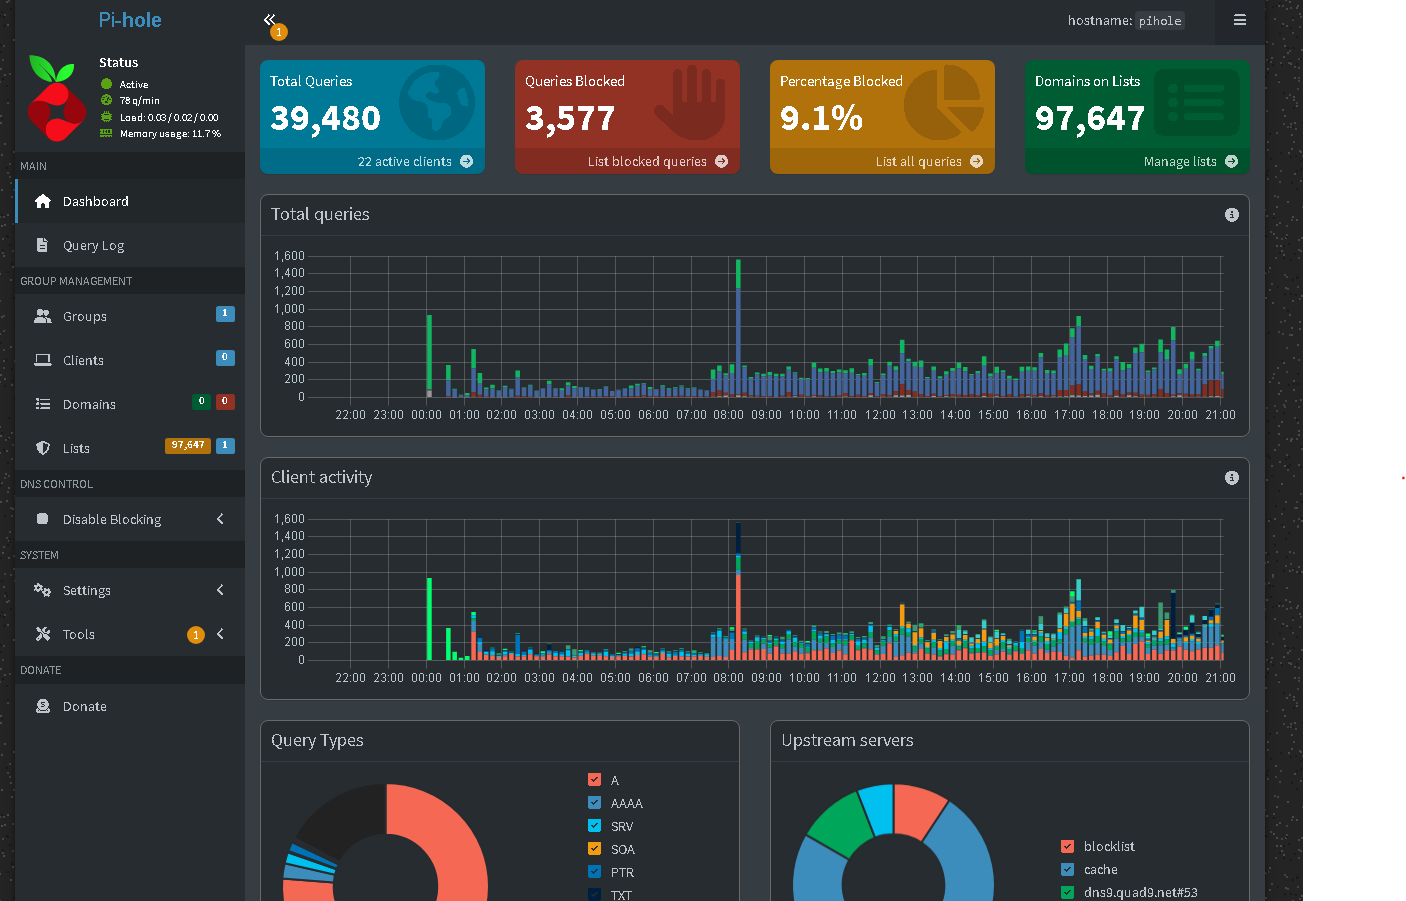
A couple of notes on next steps I’d recommend in no real particular order:
- Set your router or devices you want using Pi-hole to point their DNS to your Raspberry Pi.
- Configure the Upstream DNS Servers you want to use
- Configure and customize your own allowlists and blocklists for your own network needs
- Optionally configure the Pi-hole to be your network’s DHCP server
- Note: definitely make sure your static IP address is set before switching DHCP services from your router to the Pi!!
- Create an encrypted DNS end-to-end service to allow you to reach your Pi-hole remotely using DNS-over-TLS (DoT) and DNS-over-HTTPS (DoH)
- I currently have this running for my Android phone to benefit from my Pi-hole even on the go! Let me know if you want the guide for this one! 🙂